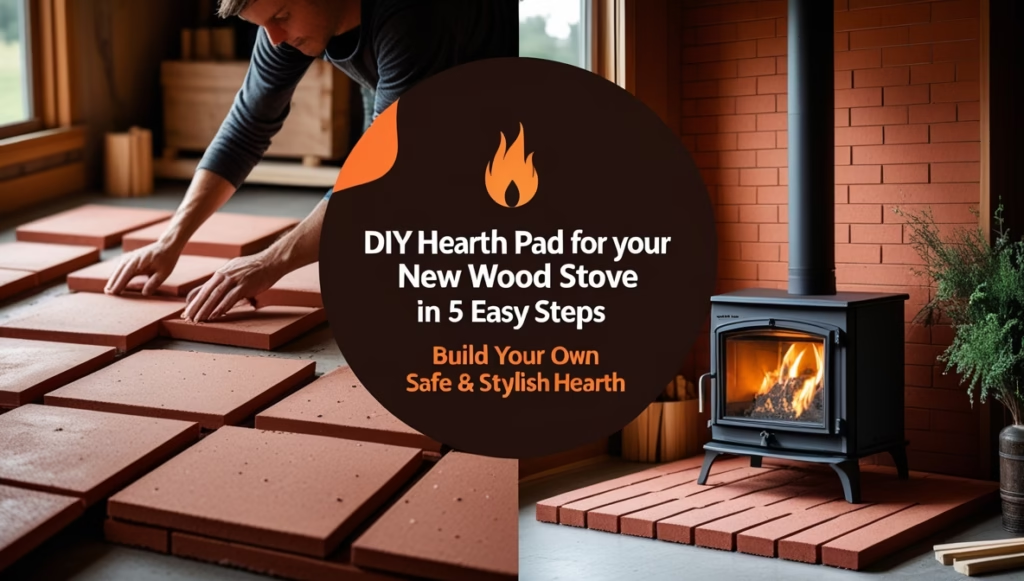
Why Build a DIY Hearth Pad?
A hearth pad is an essential safety feature for any wood stove installation. Its primary purpose is to protect your floor from the extreme heat and potential embers that can escape from the stove. Without a proper hearth pad, you risk causing serious damage to your home’s flooring and creating a fire hazard.
Building a DIY hearth pad offers several benefits over purchasing a pre-made option. First and foremost, it allows you to customize the size, shape, and materials to perfectly fit your space and design aesthetic. You can choose from a wide range of tiles, stones, or bricks to create a unique and eye-catching centerpiece for your room.
Additionally, a DIY project can save you a significant amount of money compared to hiring a professional or buying a premade hearth pad. With some basic tools and materials, you can construct a durable and functional hearth pad that meets all safety requirements.
This comprehensive guide will walk you through the entire process of planning, designing, and constructing your own DIY hearth pad. We’ll cover everything from choosing the right materials and determining the appropriate size to laying out the tiles and ensuring proper installation.
Safety will be a top priority, as we’ll provide essential tips for maintaining clearances, using non-combustible materials, and protecting your home from potential hazards.
Whether you’re an experienced DIYer or a beginner looking to tackle your first home improvement project, this guide will equip you with the knowledge and confidence to build a stunning and safe hearth pad for your wood stove.
Planning the Size and Location
One of the most critical aspects of building a DIY hearth pad is ensuring it meets the proper size and clearance requirements for your wood stove.
Manufacturers provide specific guidelines on the minimum hearth pad dimensions needed based on the stove’s size and heat output. Typically, you’ll want a hearth pad that extends at least 18-20 inches from the front of the stove and 8 inches on either side.
However, it’s always best to consult your stove’s installation manual or contact the manufacturer for their exact recommendations. Some larger or higher-output stoves may require even greater clearances.
Local building codes may also have specific hearth pad size minimums, so be sure to check those as well.
When choosing the location for your hearth pad, clearances to combustible materials are key. The hearth pad area must maintain a safe distance from walls, furniture, draperies, and other flammable surfaces as specified by the stove manufacturer and local codes.
A common guideline is at least 36 inches of clearance in front of the stove’s opening and 12 inches on the sides and rear.
Consider the stove’s venting needs and ensure the hearth pad location allows for proper clearances around the stovepipe or chimney. You’ll also want to think about aesthetics and traffic flow in the room when determining the ideal spot for your new hearth pad installation.
Choosing Hearth Pad Materials
One of the most important decisions when building a DIY hearth pad is selecting the right materials. The hearth pad needs to be able to withstand high temperatures and protect your floor from errant sparks or embers. Some popular options include tile, stone, slate, and brick.
Tile: Ceramic, porcelain, or quarry tiles are a classic choice for hearth pads. They come in a wide range of colors, patterns, and textures to complement your decor. Tile is durable, easy to clean, and can withstand very high temperatures up to 2000°F or more. However, tiles can crack under extreme temperature changes, so it’s important to use a high heat-resistant thinset mortar when installing.
Stone: Natural stone like granite, soapstone, or limestone offers a beautiful and highly heat-resistant option. Stone is extremely durable and can easily handle the heat from a wood stove. The downside is that stone can be more expensive and requires more labor to install properly. Lighter colored stones may also show soot stains over time.
Slate: This metamorphic rock has been used for centuries as a heat-shielding material. Slate is virtually impervious to heat and scratches. It has a rustic, textured look that complements traditional and modern decors. However, slate can be brittle and may crack if not installed correctly over a very sturdy base.
Brick: Full brick or thin brick veneers make for a classic, vintage-inspired hearth pad. Brick handles heat exceptionally well and can give your hearth a warm, inviting ambiance. The potential downsides are that brick can be difficult to cut and install for DIYers, and it may not complement all decorating styles.
No matter which material you choose, always use non-combustible adhesives, mortars, and grouts formulated to withstand the high heat from your wood stove installation. With the proper materials and installation, your DIY hearth pad will be both functional and beautiful for years to come.
Designing Your Hearth Pad
The hearth pad design is an opportunity to complement your home’s style and add a decorative touch to your wood stove area. Consider the room’s overall aesthetic and color scheme when selecting your hearth pad materials.
Popular layout patterns include:
- Running bond: Staggered rows create a classic brick look
- Herringbone: Tiles laid in a V-shape pattern add visual interest
- Diagonal: Tiles installed at a 45-degree angle for a dynamic look
- Mosaic: Small tiles arranged in geometric designs or murals
For a custom look, incorporate accent tiles as borders or inlays. Glass tiles, metal inserts, or stone mosaics can add pops of color and texture. Decorative tile edge trim is another way to finish off the hearth pad with style.
If using natural stone like slate or granite, explore unique patterns like ashlar or crazy paving for an organic, rustic vibe. Mixing different tile sizes or materials can create one-of-a-kind designs.
The shape doesn’t have to be limited to a standard rectangle either. Curved or angled edges soften the look. Just be sure to account for clearances to combustibles.
Finally, consider how grout color impacts the overall design. Contrasting grout helps define individual tiles, while a matching grout shade creates a seamless, uniform appearance.

Tools and Supplies Needed
To build your own DIY hearth pad, you’ll need to gather the following tools and materials:
Tools:
- Trowels (V-notch and margin trowels)
- Tile saw or angle grinder with diamond blade
- Mixing bucket and drill with mixing paddle
- Rubber grout float
- Sponges
- Tile spacers
- Tile nippers
- Knee pads
- Safety glasses
- Dust mask
Materials:
- Cement backer board
- Thinset mortar
- Tile or stone for hearth surface
- Grout
- Caulk (heat-resistant, non-combustible)
- Backer rod for caulking gaps
- Edge trim or tile edging (optional)
Having the right tools on hand will make the tiling process much smoother. For the hearth surface, choose fire-rated, non-combustible tiles or stone slabs. Cement backer board provides a sturdy, heat-proof underlayment. And heat-resistant thinset, grout, and caulk ensure your hearth pad meets all fire safety codes.
Prepping the Surface Area
Before you can install your new hearth pad, the surface area needs to be properly prepared. This involves removing any existing flooring materials, leveling the subfloor, and installing a cement backer board as a base.
Removing Old Flooring
If you already have flooring like laminate, hardwood, or tile installed where the hearth pad will go, you’ll need to remove it first. Use a pry bar to carefully lift and remove the materials, being careful not to damage the subfloor underneath. For tile floors, you may need to use a small sledgehammer and cold chisel to break up the tiles before prying them up.
Leveling the Subfloor
Next, inspect the subfloor and identify any areas that are uneven or damaged. Use a long level to check for dips or high spots. Fill in low areas with a polymer-based floor leveling compound and allow it to fully cure according to manufacturer instructions. For significantly uneven floors, you may need to install new subfloor panels.
Installing Cement Backer Board
A cement backer board provides a sturdy, non-combustible surface for your hearth pad tiles. Cut the backer board to fit the area using a scoring knife or saw with a diamond blade. Secure it to the subfloor using thinset mortar and backer board screws every 6-8 inches. Tape and fill any seams between boards with alkaline-resistant mesh tape and thinset mortar for a smooth transition.
With a level, well-prepped surface, you’re now ready to start laying out and installing the tiles or stones for your custom DIY hearth pad design.
Laying Out the Tile Pattern
Before permanently installing your hearth pad tiles, it’s crucial to plan out the layout and dry fit the pieces. This step ensures you achieve the desired pattern and allows you to make any necessary adjustments before securing the tiles in place.
Start by measuring the area where the hearth pad will be installed. Carefully mark the dimensions on the floor using a pencil or chalk line. Next, lay out the tiles in the planned pattern within the marked area, leaving small gaps between each tile for grouting later.
If you’re using larger format tiles, you may need to cut some pieces to fit along the edges. Use a tile scorer or wet saw to make precise, clean cuts. Dry fit the cut tiles, ensuring they align properly with the full tiles. Adjust and rearrange the layout as needed until you’re satisfied with the pattern and fit.
Once you have the tiles positioned exactly how you want them, number each one with a pencil or painter’s tape to avoid confusion when you start the installation process. Take photos of the dry laid pattern for reference as well.
It’s essential to take the time to carefully plan and dry fit the tile layout before securing anything in place permanently. This step may seem tedious, but it will pay off in the end with a professional-looking, properly fitted hearth pad installation.
Installing the Hearth Pad Tiles
With the surface prepped and your tile layout planned, it’s time to start installing the tiles for your DIY hearth pad. You’ll need a trowel, tile spacers, a rubber mallet, and a bucket of thinset mortar mixed according to the manufacturer’s instructions.
Begin by spreading thinset over a small section of the backer board using the flat side of your trowel. Then use the notched edge to create evenly spaced ridges in the thinset. This will help the tiles adhere properly.
Set your first tile in place, pressing it firmly into the thinset. Use the rubber mallet to gently tap the tile and embed it fully. Insert tile spacers at the corners to maintain even grout lines between tiles.
Continue laying tiles row by row, spreading more thinset as needed. Frequently check that the tiles are level and the grout lines are straight and consistent.
For tiles with an intricate pattern, it may help to do a dry run first to visualize the layout before setting them in thinset. Make any needed cuts to tiles along the edges using a tile saw or scorer.
Once all tiles are in place, allow the thinset to cure completely according to the drying time on the package before grouting. Be sure to clean any thinset from the tile surface as you go using a damp sponge.
With the tiles securely installed, your custom DIY hearth pad is really taking shape! In the next step, we’ll show you how to apply grout for a professional, finished look.
Grouting and Finishing
After setting all the tiles into place with thinset mortar, it’s time to grout. Grouting fills the joints between tiles and helps lock everything in place for a durable, long-lasting hearth pad. Here’s how to properly grout and finish your DIY tile hearth pad:
Mixing the Grout
Use an unsanded grout for joints 1/8 inch or less, and a sanded grout for wider joints up to 1/2 inch. Follow the manufacturer’s instructions for the proper water-to-grout ratio. Mix just enough to use within 30 minutes.
Applying the Grout
Use a grout float held at a 45-degree angle to pack the grout into the joints, working in small sections. Ensure the grout fills the joints fully with no voids.
Cleaning as You Go
With a damp sponge, carefully wipe away excess grout from the tile surfaces before it dries, moving diagonally to avoid dragging grout out of the joints. Rinse the sponge frequently.
Striking the Joints
Once the grout begins to firm up, usually after 15-20 minutes, use a striking tool to gently pack the grout down into the joints for an attractive, consistent appearance.
Final Cleaning
After the grout has set for a couple of hours, make a final pass with the damp sponge to clean off the tile faces. Avoid excessive water.
Grout Haze Removal
If a cloudy grout haze remains after cleaning, use a grout haze remover and scrub pad to buff off the film, following manufacturer’s instructions.
Sealing the Grout
Once the grout is fully cured (check manufacturer times), apply a grout sealer or grout release to protect against stains and make future cleaning easier. Follow the sealer’s application guidelines.
With proper grouting and sealing, your beautiful new DIY hearth pad will be ready to enhance your wood stove for years of warmth and style.
Edge Trim and Finishing Touches
Once your hearth pad tiles are fully installed and grouted, you’ll want to give it a clean, finished look with edge trim. Trim pieces come in a variety of materials like metal, stone, or wood and can be found at most home improvement stores. Choose a trim that coordinates with the style and color of your hearth pad.
When installing edge trim, you’ll need to cut the pieces to fit tightly against the tiles using a miter saw or angle grinder with a diamond blade. Secure the trim with construction adhesive made for bonding to tile and masonry surfaces. For outside corners, miter or cope the trim pieces to create a clean joint.
Any remaining gaps between the trim and tiles should be filled with a high-temperature, fire-resistant caulk rated for use around wood stoves. This prevents combustible materials from falling into the gaps. Smooth the caulk bead with your finger for a finished look.
If desired, you can also add decorative accent tiles or stone along the edge of the hearth pad. This can help tie it in with the surrounding flooring or fireplace surround. Just be sure any materials used are completely non-combustible when installed near a wood stove.
Wood Stove Safety Essentials
Safety should be the top priority when installing a wood stove and building a hearth pad. Maintaining proper clearances from combustible materials is crucial to prevent fires. Follow the manufacturer’s instructions and local building codes for minimum clearance distances around the stove and hearth pad.
Using non-combustible materials like stone, tile, brick, or concrete is essential for the hearth pad itself. These materials won’t catch fire or allow heat to pass through. Avoid wood, carpet, vinyl, or other flammable materials in the hearth pad construction.
Proper ventilation is also key for wood stove safety. Ensure there is adequate airflow around the stove and hearth pad to prevent overheating. Never block air inlets or chimneys. Consider adding a heat shield between the hearth pad and nearby walls for extra protection.
Other safety tips include keeping combustible items like furniture, curtains, and firewood at a safe distance from the hot surfaces. Install smoke and carbon monoxide detectors nearby. Have a fire extinguisher on hand and learn how to properly operate the wood stove before use. Regular cleaning and maintenance of the stove and chimney is also important to prevent hazardous creosote buildup.
Caring for Your DIY Hearth Pad
Proper care and maintenance are essential to keep your DIY hearth pad looking great and performing safely for years to come. The cleaning routine will depend on the specific materials you used, but here are some general tips:
Tile/Stone Hearth Pads
- Sweep or vacuum regularly to remove dust and debris. Avoid harsh scrubbing as it can damage the surface.
- For periodic deeper cleaning, mop with a pH-neutral cleaner designed for tile and stone. Avoid abrasive or acidic cleaners.
- Immediately wipe up any spills to prevent staining.
- Re-seal the tile/stone every 1-2 years with a penetrating sealer to protect against moisture.
Slate Hearth Pads
- Use a dry cloth or soft brush to dust regularly.
- For stuck-on grime, make a paste with water and mild pH-neutral soap. Gently scrub and rinse thoroughly.
- Avoid harsh cleaners as slate is porous and can absorb chemicals.
- Reseal slate annually with a slate sealer to preserve the rich colors.
Brick Hearth Pads
- Vacuum or sweep frequently to remove ashes and soot buildup.
- For deeper cleaning, use a stiff brush and mild pH-neutral soap with water. Scrub gently.
- Rinse thoroughly and towel dry to prevent efflorescence (white mineral deposits).
- Reseal bricks every few years with a penetrating brick sealer.
No matter the material, avoid using excessive water near your wood stove, as moisture can potentially damage the stove or cause rusting. With proper routine cleaning and resealing, your beautiful DIY hearth pad will maintain its fresh look for many years.
When to Hire a Professional
While a DIY hearth pad project can be rewarding, there are certain situations where it’s advisable to hire a professional installer. Safety should always be the top priority when working with wood stoves and other heating appliances.
Professional installation is highly recommended if:
- You have limited DIY experience or are unsure about proper installation techniques for a hearth pad. Improper installation could create fire hazards.
- Your wood stove requires specialized clearances or has unique installation requirements beyond a basic hearth pad. Professionals understand all relevant building codes.
- The hearth pad area involves structural modifications like removing load-bearing walls. Professionals can ensure your home’s integrity isn’t compromised.
- You need to extend the hearth pad into another room or install it on a complex floor layout with angles or curves. Precise cuts are crucial for a proper fit.
- Your wood stove’s clearance requirements call for a very large hearth pad that may be difficult to construct and maneuver alone.
- You plan to use heavy, thick stone or other premium materials that require special equipment or expertise to install properly.
Even if you decide to take the DIY route, consider having a professional inspect your work before operating the wood stove. A small investment in an expert opinion could prevent disastrous safety issues down the road.
Conclusion
You’ve learned all the key steps to design and install a beautiful, safe DIY hearth pad for your wood stove. From choosing the ideal materials and location to laying out the tile pattern and grouting, this project allows you to showcase your creativity while ensuring proper clearances.
Don’t forget the finishing touches like edging trim and any decorative elements to really make it your own. Once complete, be sure to share photos of your finished hearth pad! We’d love to see your hard work and unique design.
While this is certainly a manageable DIY project for many homeowners, don’t hesitate to hire a professional if you lack the tools, skills or confidence. Safety should always be the top priority when working around wood stoves and fireplaces.
With some planning and effort, you can enjoy the warmth and ambiance of your wood stove along with an attractive, custom hearth pad that adds style and value to your home. Happy tiling!

Haris Virk is the creative force and expert content strategist behind ScrapSafari.com. As an accomplished writer and designer, Haris leads the development of innovative content and visually stunning images that captivate audiences. His extensive experience in crafting engaging articles and unique design ideas makes him a pivotal contributor to ScrapSafari’s success.
Haris’s keen eye for aesthetics and trend forecasting ensures that every piece he produces not only informs but also inspires readers. His proficiency extends to mastering Pinterest strategies, where his thoughtfully crafted pins drive significant traffic and amplify the site’s reach.
With a passion for creativity and a deep understanding of content dynamics, Haris Virk brings a distinctive blend of originality and strategic thinking to the ScrapSafari team, solidifying its place as a go-to source for design, ideas, and inspiration.