Building custom wood shelves for your closet offers several advantages over purchasing pre-made shelving units. One of the primary benefits is cost savings. By constructing the shelves yourself, you can significantly reduce the expense compared to buying ready-made shelving systems, which can be quite pricey, especially for larger closets or walk-in spaces.
Another major advantage of building your own closet shelves is the ability to customize them to perfectly fit your space and specific needs. Pre-made shelving units often come in standard sizes, which may not optimally utilize the available space in your closet. By building custom shelves, you can tailor the dimensions, shelf depths, and configurations to maximize every inch of your closet, ensuring efficient use of the space.
Additionally, custom-built shelves allow you to personalize the design and aesthetics to complement the style of your home or desired closet aesthetic. You can choose the type of wood, finishes, and hardware that best suit your preferences, creating a cohesive and visually appealing storage solution that seamlessly integrates into your living space.
Tools and Materials Needed
To tackle this DIY closet shelving project, you’ll need a few essential tools and materials. First, gather the following tools:
- Circular saw or table saw for cutting the wood
- Drill for driving screws and making pilot holes
- Sander for smoothing edges and preparing for finishing
- Measuring tape and pencil for marking dimensions
- Level to ensure shelves are installed straight
- Safety gear like goggles and work gloves
As for materials, plywood or solid wood boards are the go-to choices. Plywood is affordable and easy to work with, while solid wood offers a more premium look. Consider these wood options:
- 3/4″ thick plywood sheets for the shelves
- 1×2″ or 1×3″ solid wood boards for the trim and facing
- 2×4″ boards for constructing supports and bracing
You’ll also need some additional materials like:
- Wood screws or nails for assembly
- L-brackets, shelf pins, or other mounting hardware
- Wood glue for reinforcing joints
- Wood filler to conceal screw holes or gaps
- Stain, paint, or clear finish if you want to add color or protection
Having the right tools and materials on hand will make this project much smoother. Once you’ve gathered your supplies, you’re ready to start measuring, cutting, and assembling your custom closet shelves.
Selecting and Cutting the Wood
Choosing the right type and thickness of wood for your closet shelves is crucial for durability and aesthetics. Plywood or solid wood boards like pine or oak are excellent choices. For standard closet shelves, 3/4 inch thick material is recommended to support moderate weight without sagging over time.
When measuring for your shelves, carefully determine the length and depth needed based on your closet dimensions. It’s better to underestimate than overestimate to ensure a proper fit. Use a tape measure and make pencil marks on the wood before cutting.
Cutting wood requires safety precautions. Always wear eye protection and keep the work area clear of clutter. For straight cuts, use a circular saw with a straight edge guide or a table saw. For curved or angled cuts, a jigsaw may be necessary. Go slowly and keep the blade sharp for clean cuts.
Let the saw do the work and avoid forcing it through the wood. Support the wood properly and never cut anything free-hand. Unplug saws when making adjustments or clearing cut pieces. With the right wood, precise measurements, and safety in mind, you’ll be ready for the assembly phase.
Assembly and Construction
Once you have all your wood pieces cut to size, it’s time to start assembling the shelves. Here are the step-by-step instructions:
- Lay out all the pieces – Arrange the side panels, shelves, and any trim pieces on a flat surface in the configuration they will be assembled.
- Join the side panels – Use wood glue and 2-inch finish nails or 1-1/4 inch screws to join the two side panels together at a 90-degree angle. Clamp and let dry completely.
- Attach bottom shelf – Run a bead of wood glue along the bottom edges of the side panels. Position the bottom shelf piece and secure with finish nails or screws into the side panels, being careful not to go through the shelf.
- Build up shelves – Working from bottom to top, apply glue to the side panel edges and position the next shelf. Secure with nails/screws through sides into shelf edges. Repeat for remaining shelves, ensuring they are level.
- Add trim (optional) – If using trim pieces for a finished look, glue and nail/screw the trim into place on the exposed edges.
- Install shelf supports – For shelves over 2 feet wide, you’ll need horizontal supports screwed into the side panels. Space supports every 16-24 inches along the length.
- Reinforce joints – For extra strength and rigidity, consider adding corner braces or gussets using glue and finishing nails at all interior joints.
Take your time on this step to ensure everything is square, level, and properly supported for holding weight. Allow all glue to fully cure before mounting.
Installing and Mounting
Proper installation and mounting is crucial for ensuring your custom wood shelves are sturdy, level, and able to support weight safely. Before installing the shelves, prepare the closet walls by locating the studs using a stud finder. Studs provide the solid backing needed to securely anchor the shelf supports.
For drywall or plaster surfaces, use plastic wall anchors rated for the expected weight load. Drill pilot holes slightly smaller than the anchors, then firmly tap them into place. Wood studs allow you to drive screws directly into the solid framing.
To mount shelves, start with the bottom shelf and work upwards. Position the shelf at the desired height and use a level to ensure it’s perfectly horizontal. Mark the wall stud locations along the shelf, then secure with screws or lag bolts into the anchors or studs. For extra support on longer shelves, add a bracket or L-shaped metal corner brace at each end.
Space subsequent shelves vertically based on your storage needs, maintaining at least 12-16 inches between each one. Double-check that every shelf is level from side to side. Once all shelves are securely mounted, load them gradually from the middle outwards to prevent sagging over time.
Finishing and Staining (Optional)
Finishing and staining your custom wood shelves is an optional step, but it can provide several advantages. First, a finish like paint, stain, or clear coat will protect the wood from moisture, scratches, and general wear and tear. This can extend the life of your shelves significantly. Additionally, staining or painting allows you to customize the appearance of the shelves to match your closet decor or personal style preferences.
Before applying any finish, proper surface preparation is key. Start by sanding the wood smooth with progressively finer grits of sandpaper until the desired smoothness is achieved. Wipe away any dust with a clean cloth. For stains or paints, you may need to apply a wood conditioner first to help the finish go on evenly.
When staining, use a clean rag or brush to apply the stain in the direction of the wood grain. Wipe away any excess stain that hasn’t penetrated the wood. Allow the recommended drying time between coats if a second coat is needed. For paint, use a brush or roller designed for use with the specific type of paint (oil-based, latex, etc). Apply in thin, even coats, allowing each coat to fully dry before adding another.
Clear topcoats like polyurethane or lacquer can provide an extra layer of protection once the stain or paint has dried completely. These are typically applied with a brush or spray gun in several thin coats, sanding lightly between coats. Be sure to work in a well-ventilated area when using any oil-based finishes.
Design Considerations
When designing custom wood shelves for your closet, there are several key factors to consider beyond just the construction. Proper planning in this phase will ensure your new shelving system is functional, visually appealing, and maximizes your closet’s storage potential.
Ideal Shelf Depth and Height
The depth of your shelves is an important consideration. Most closet shelves are between 12-16 inches deep, which provides enough space for items like folded clothing, shoes, and storage bins without wasting too much space. Deeper shelves around 16 inches allow for double hanging rods as well. As for height, aim for shelves spaced 12-15 inches apart vertically to fit standard storage boxes and accommodate most items.
Aesthetic Considerations
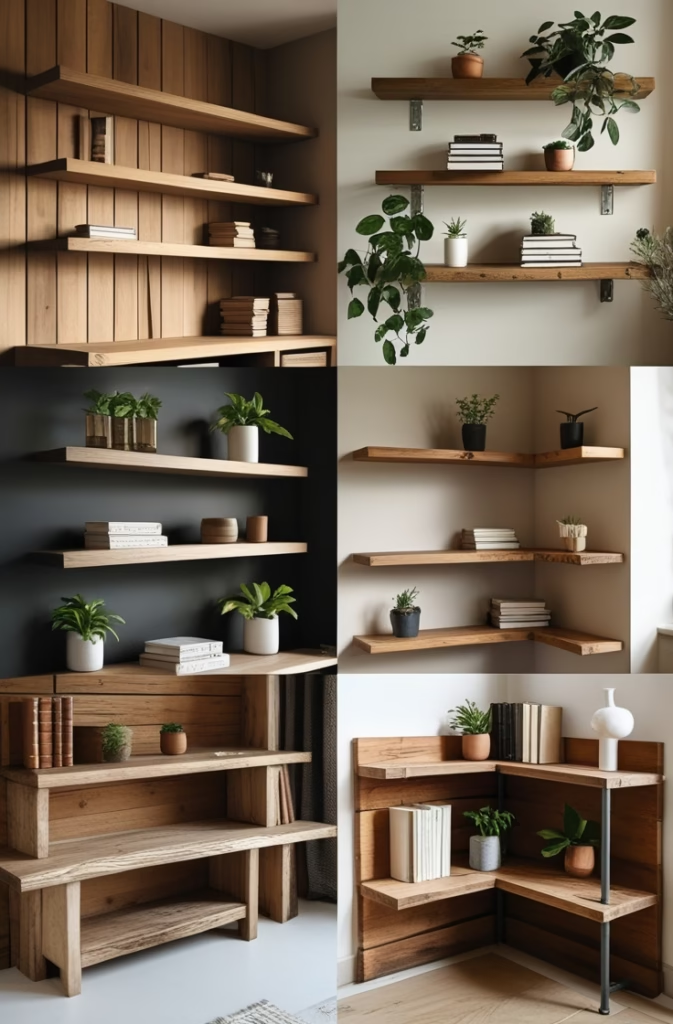
While functionality is paramount, you’ll also want your new shelving to look great. Consider finishes like paint or stain that complement your closet’s color scheme. Add trim or edge-banding for a polished, built-in look. You can even customize shelf depths on different sections – for example, deeper shelves up top for bulky items and shallower shelves below for folded clothes.
Incorporating Additional Storage
Get creative with integrating extra storage solutions into your design. Add pull-out baskets or drawers below the hanging area. Install vertical dividers to keep items upright and organized. Hang a series of specialized racks for ties, belts, or scarves on the back wall. With some planning, you can create the ultimate custom closet tailored to your exact needs.
Common Mistakes to Avoid
One of the biggest pitfalls when building custom wood shelves is undersizing or improperly supporting the shelves. Skimping on wood thickness or failing to provide adequate support spans can lead to sagging or collapsing shelves down the road. As a general rule, use 3/4″ thick plywood or solid wood for shelves and ensure supports are no more than 2-3 feet apart.
Poor installation or sloppy mounting techniques are another common issue. Shelves that are not securely fastened into wall studs or lack proper anchoring can eventually become loose or dislodged entirely. Take the time to locate studs precisely and use appropriate hardware like long screws or anchors rated for the expected load.
Finally, don’t underestimate the weight and load capacity needed for your shelving unit. Bulky items like books, files, or storage boxes can add up quickly. Aim for shelves rated to support at least 50 lbs per linear foot, and consider distributing heavier loads across multiple shelves. Overloaded shelves increase the risk of bowing, cracking or catastrophic failure over time.
Maximizing Storage and Organization
Proper planning is key to maximizing the storage and organization potential of your custom closet shelves. Start by taking inventory of all the items you need to store, grouping them by category. This will help you determine the ideal shelf dimensions and layout.
For example, dedicate upper shelves to items used less frequently like off-season clothing or spare linens. Lower shelves should house everyday items for easy access. Add pull-out baskets or drawers for smaller accessories like belts, scarves, and jewelry.
Incorporate additional storage solutions alongside the shelves. Install a second hang rod for longer garments. Use over-the-door organizers for shoes, hats, or purses. Hang a full-length mirror on the back of the closet door.
Don’t forget to customize certain shelves for specific items. Create cubbies with dividers for purses, shoes or folded sweaters. Add slide-out trays or slanted shelves for items you want easily visible like t-shirts or workout gear. Leave open space at the bottom for bulkier items like luggage or storage bins.
With some creative planning, your DIY closet shelves can provide stylish, functional storage for every possession. Maximize every inch of space while keeping items neatly organized and easy to access.
Conclusion
Building custom wood shelves for your closet is an incredibly rewarding DIY project that provides both functional and aesthetic benefits. Not only do you gain valuable storage and organization, but you can create shelving tailored perfectly to your closet’s dimensions and your personal style preferences.
The cost savings of a DIY project are substantial compared to purchasing pre-made shelving units. With some basic tools and materials, you can build professional-quality shelves for a fraction of the price. The ability to customize the depth, height, wood type, and finish also ensures your closet storage meets your exact needs.
While there is some sweat equity involved, the sense of pride and accomplishment from a job well done makes it all worthwhile. Don’t be intimidated if you’re a DIY novice – this project is absolutely achievable with careful planning and patience. Use this guide as a roadmap, watch some instructional videos online, and have confidence in your abilities.
If you get stuck at any point, don’t hesitate to consult online forums or your local hardware store for expert advice. With the right preparation and mindset, you can create stunning, functional wood shelving that transforms your closet into an organized, clutter-free oasis. So roll up your sleeves, grab your tools, and get building!

Haris Virk is the creative force and expert content strategist behind ScrapSafari.com. As an accomplished writer and designer, Haris leads the development of innovative content and visually stunning images that captivate audiences. His extensive experience in crafting engaging articles and unique design ideas makes him a pivotal contributor to ScrapSafari’s success.
Haris’s keen eye for aesthetics and trend forecasting ensures that every piece he produces not only informs but also inspires readers. His proficiency extends to mastering Pinterest strategies, where his thoughtfully crafted pins drive significant traffic and amplify the site’s reach.
With a passion for creativity and a deep understanding of content dynamics, Haris Virk brings a distinctive blend of originality and strategic thinking to the ScrapSafari team, solidifying its place as a go-to source for design, ideas, and inspiration.