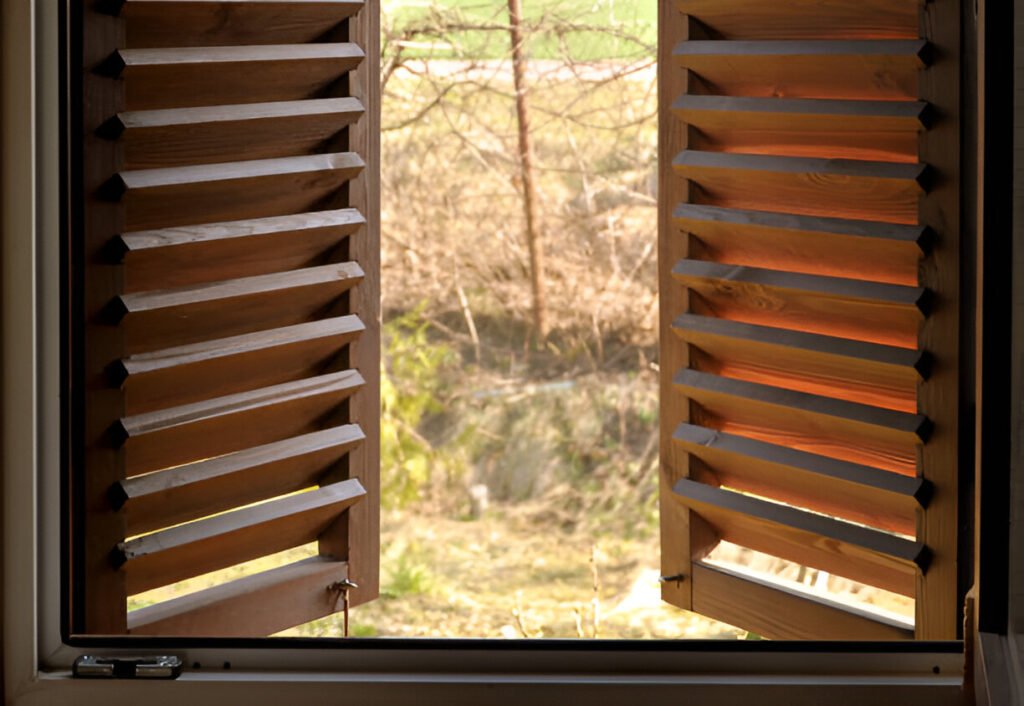
Building custom wood shutters for your home is an extremely rewarding DIY project that can save you thousands of dollars compared to purchasing prefabricated shutters. By constructing the shutters yourself, you gain complete control over the design to craft an exterior accent that perfectly complements your home’s architectural style and enhances its curb appeal.
One of the biggest benefits of a DIY shutter project is the cost savings. Professionally installed wood shutters can cost upwards of $1,000 per window, making them largely unaffordable for many homeowners. Taking the DIY approach allows you to source quality materials at a fraction of that cost. With some basic tools and woodworking skills, you can create stunning custom shutters tailored to your exact specifications.
In addition to the financial incentive, building shutters yourself enables you to achieve a truly unique look that you won’t find with off-the-shelf products. You can select premium wood species, design distinctive louver styles, and incorporate special details that give your home character. Whether replicating a traditional style or bringing a modern flair, DIY wood shutters put you in the driver’s seat for crafting an exterior that turns heads.
Tools and Materials Needed
To build your own wood shutters, you’ll need to gather the following essential tools and materials:
Woods:
- Cedar and pine are excellent choices for exterior shutters due to their natural weather resistance and durability. Cedar offers a beautiful warm tone, while pine is more affordable.
- Hardwoods like oak or maple can also be used, but they are more susceptible to warping and cracking in outdoor conditions.
- Avoid using plywood or other composite woods, as they won’t hold up as well long-term.
Tools:
- Miter saw or circular saw for cutting wood to length
- Table saw or circular saw with a straight edge guide for ripping wood into slats
- Drill for driving screws and boring hinge holes
- Clamps to hold the shutter frame securely while assembling
- Sandpaper (varying grits) for smoothing edges before finishing
Hardware:
- Galvanized or stainless steel screws to prevent rusting
- Exterior-grade hinges sized appropriately for your shutters’ thickness
- Shutter dogs, pull rings, or tiebacks to secure the shutters when open
- Wood glue for added strength in the frame joints (optional)
Finishing Supplies:
- Exterior primer and paint or wood stain, depending on your desired look
- Paintbrushes and/or spray equipment for applying finish
- Wood sealer or weatherproofing treatment for enhanced protection
Having all the necessary tools and materials on hand will make your shutter building project go much smoother. Take time to select high-quality woods and hardware that will withstand the elements beautifully for years to come.
How To Build Wood Shutters
Measuring Window Openings
Precise measurements are crucial when building custom wood shutters to ensure a proper fit. Start by measuring the width and height of your window openings using a metal tape measure. Measure the width across the top, middle, and bottom of the opening, using the smallest measurement. For the height, measure vertically at the left, center, and right sides, again using the smallest dimension.
If you plan to include louvers or angled slats in your shutter design, you’ll need to account for the thickness of the louvers and the space between them. Typically, louvers are spaced 1 to 2 inches apart. Measure the total projection the louvers will add to the overall depth of the shutters. Then, increase your window measurements by that amount to allow the shutters to close properly with the louvers fully rotated.
Additionally, you’ll want to build your shutters slightly larger than the window opening to create light gaps on the sides and top when closed. A common practice is to add 1/2 to 3/4 inch to the width and height measurements. This small overlap permits the shutters to open and close smoothly while preventing light leaks.
By taking meticulous window measurements and making allowances for louvers and light gaps, you’ll be able to craft shutters that complement your windows flawlessly.
Cutting the Wood
Precision is key when cutting the wood pieces for your shutters. You’ll want to follow your measurements exactly to ensure a proper fit in the window openings.
Start by cutting all the boards to the required lengths using a miter saw or circular saw. It’s best to make the horizontal top and bottom pieces slightly longer than needed, so you can trim them for an exact fit after assembly.
Next, rip the longer boards lengthwise into the slat widths you’ve chosen for your shutter design. A table saw works well for this, allowing you to set the fence and make repetitive rip cuts. Common slat widths range from 2-6 inches wide. Narrower slats create a more traditional look.
If you plan to have operable louvers in your shutters, you’ll need to cross-cut kerfs into each slat piece. Set your saw blade depth to about halfway through the wood thickness. Then make a series of stopped cuts from each edge, leaving spaces between each kerf for the louver to pivot. Spacing the kerfs 2-4 inches apart creates nice-sized operable louvers.
Take your time measuring and cutting precisely. Having all the wood pieces cut accurately will make shutter assembly much easier in the next steps.
Assemble Shutter Frame
With all the wood pieces cut to size, it’s time to assemble the frame that will hold the shutter slats. Start by cutting the horizontal cross-pieces that will make up the top, middle and bottom rails of the frame. These should be cut slightly longer than the overall shutter width to allow for overlap on the sides.
Lay out the vertical stile pieces on a flat surface and use a framing square to ensure they are perfectly parallel. Position the top and bottom rail pieces between the stiles, ensuring they are square. Apply wood glue to the end joints and clamp everything together tightly. Drill pilot holes and drive in 2-3 inch galvanized deck screws to permanently secure the frame.
If adding louvers for operable shutters, space out the horizontal slats evenly based on the desired louver size. Use spacers or washers to create a consistent gap between each slat. Apply wood glue along the back edges and clamp the slats one by one into the frame, checking for square after each addition.
For fixed, non-operable shutters, the slats can be butted tightly together. Glue and nail them into place using 1-inch brad nails. Use wood filler to conceal any nail holes once the glue dries.
With the slats installed, cut and attach any remaining horizontal rails at the top and bottom of the shutter frame. This completes the basic shutter assembly before moving on to installation hardware.
Installing Shutter Hardware
With the shutter frame assembled, it’s time to add the functional hardware. Start by mounting the hinges that will allow the shutters to swing open and closed. Measure carefully to ensure the hinges are aligned and evenly spaced. Use a drill with a pilot hole bit to prevent wood splitting, then secure the hinges with screws.
Next, add the hasp or pull ring on the front side of the shutter. A hasp is a U-shaped metal piece that a sliding lock can clasp into when closed. Pull rings are decorative handles that make it easier to grip and open shutters. Position these pieces at a comfortable height and secure them with screws.
Before installation, test that the shutters open and close smoothly. The hinges should swing freely without binding. Make any adjustments to the hinge placement or shutter alignment needed for proper operation. Applying a light coat of wax to the hinges can help them move more fluidly over time.
With the hardware installed, your custom shutters are now fully functional. Ensure smooth opening and closing to complete this phase before moving on to finishing and installation.
Finishing the Shutters
After assembling the shutter frames and installing the hardware, it’s time to apply the finishing touches that will protect the wood and give your shutters a beautiful, polished look. Proper finishing is crucial for ensuring your DIY shutters can withstand the elements for years to come.
Sanding
Start by sanding all the wood surfaces thoroughly with progressively finer grits of sandpaper. Sand in the direction of the wood grain to avoid scratches. Sanding removes any roughness and creates a smooth base for the finish to adhere properly. Be sure to sand all corners, edges, and grooves.
Priming
Once sanded, wipe away any dust and apply a high-quality exterior wood primer. Priming seals the wood and provides a bond for the topcoat. Use a brush or spray primer made for exterior use, following the manufacturer’s instructions. Allow the primer to dry completely before moving to the next step.
Painting or Staining
For a solid color look, apply two coats of high-quality exterior paint in your desired shade, allowing each coat to dry fully between applications. Use a paintbrush or sprayer and work in thin, even coats.
If you prefer a stained look to showcase the wood grain, choose an exterior semi-transparent or solid stain. Apply the stain with a brush, rag or sprayer, working in sections and wiping away any excess. Two coats are usually needed for full coverage.
Weatherproofing
To protect your shutters from moisture, UV rays, and temperature changes, apply a clear exterior wood sealer or marine varnish as the final topcoat. This will help prevent warping, cracking, and fading over time. Use a high-quality spar urethane or spar varnish made for outdoor use. Apply at least two coats with a brush or sprayer, allowing ample drying time between applications.
By taking the time to properly sand, prime, paint/stain, and weatherproof your shutters, you’ll ensure they maintain their beautiful appearance for years, even in harsh outdoor conditions. Quality finishing is the final key step in creating professional-looking, durable DIY wood shutters.
Installing the Completed Shutters
With the shutters fully assembled, sanded, and finished, it’s time to install them on your home’s exterior. Proper installation is crucial for ensuring the shutters hang straight, operate smoothly, and withstand the elements over time.
Start by holding the shutter up against the window opening and checking for level. If it’s not perfectly plumb, use cedar shims to level it out before permanently mounting. Slide the shims between the window frame and shutter edges until the unit is straight vertically and horizontally.
Next, mark the locations for the hinge screws on the window frame. For maximum strength and longevity, you’ll want to secure the hinges directly into the structural framing around the window, not just the exterior trim. Use a drill with a pilot hole bit to prevent splitting the wood, then drive in galvanized or stainless steel screws at each hinge location.
With the hinges securely mounted, do a final check that the shutters open and close smoothly without binding. Make any minor adjustments by slightly loosening the hinge screws and re-positioning. Once everything operates perfectly, you can apply a bead of exterior caulk around the hinges and frame to seal out moisture.
Properly installed shutters should be level, securely anchored to the home’s framing, and able to swing freely. This critical step ensures your beautiful DIY shutters will enhance your home’s curb appeal for years to come.
Design Considerations
One of the biggest advantages of building your own wood shutters is the ability to fully customize the design to match your home’s architectural style and your personal tastes. Here are some key design elements to consider:
Slat Sizes and Spacing: Shutter slat sizes can range from narrow 2-inch slats all the way up to wide 8-inch boards. Narrower slats provide a more traditional look, while wider slats create a bolder, more modern aesthetic. The spacing between slats also impacts the overall visual – tighter spacing gives a solid appearance, while larger gaps allow more light and visibility through the shutters.
Louver Styles: Incorporating louvers, or angled horizontal slats, adds functionality as well as visual interest. Traditional louvers were designed to control light and airflow, but on modern shutters they are often just decorative. Consider louver sizes from petite 1-inch blades up to broad 4-inch louvers for different looks.
Hardware Finishes: The hinges, pull rings, and other hardware can serve as subtle accent pieces or become major design elements. Matte black iron hardware creates an understated, rustic charm. Polished brass brings a bright, elegant touch. Choosing hardware that coordinates with your home’s other metallic fixtures ensures a cohesive aesthetic.
Architectural Influences: Take cues from your home’s architectural style when designing shutters. For colonial or traditional homes, you may want raised panel shutters with narrow slats and smaller louvers. More modern farmhouse styles pair nicely with broader slats and clean, simple lines. Craftsman residences look striking with thick shutters featuring horizontal rail details.
By considering slat sizes, louver styles, hardware finishes, and overall architectural influences, you can craft truly custom wood shutters that elevate your home’s curb appeal and reflect your personal design vision.
Conclusion and Further Customization
Building your own custom wood shutters is a rewarding DIY project that can save you a significant amount of money compared to purchasing pre-made shutters. By following the steps outlined in this guide – measuring the window openings precisely, cutting the wood pieces to size, assembling the frame, installing the hardware, finishing, and hanging the shutters – you can achieve a professional, custom look tailored to your home’s unique style.
Once you’ve mastered the basics of shutter construction, you can explore additional customization options to further enhance the character and curb appeal of your home. Consider adding architectural details like arched tops, which can lend an elegant, classic touch to your shutters. Alternatively, a board-and-batten design can create a rustic, farmhouse aesthetic.
For a more modern look, you could experiment with wider slat widths or incorporate unique materials like copper or zinc into your shutter design. The possibilities are endless when you build your own shutters from scratch, allowing you to truly personalize the final product to your taste and style preferences.

Tonja Nichols Ray is a creative author and DIY enthusiast who shares her passion for repurposing old items on social media. On her Instagram account @tonja.nichols, she showcases beautiful transformations of everyday objects into unique and functional pieces.
As a contributor to the website scrapsafari.com, Tonja writes detailed guides and tutorials, helping her readers discover the joys of breathing new life into vintage and discarded materials. With an eye for design and a knack for crafting, she inspires her followers to approach home decor and personal projects from a sustainable, eco-friendly perspective.