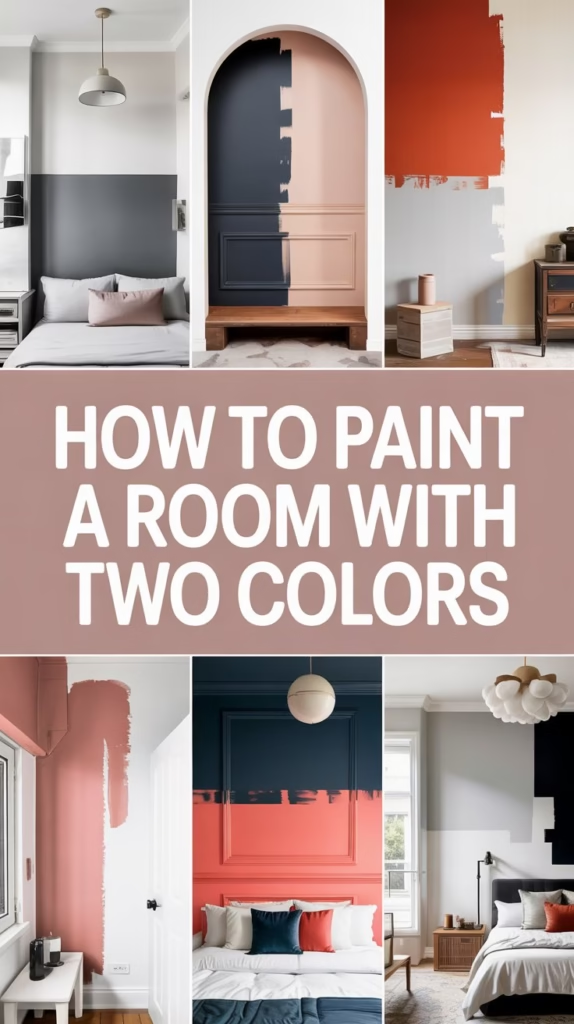
Transforming your living space can be as simple as a fresh coat of paint. When you choose to work with two colors, you add depth, contrast, and a modern twist to your décor without the expense of remodeling. In this guide, we’ll walk you through every step—from planning your design to applying the final touch-ups—so you can achieve professional-looking results in your own home.
Why Choose Two-Color Painting?
Two-color painting is an excellent way to:
- Create Visual Interest: Splitting a room’s walls into two distinct zones draws the eye and highlights architectural details.
- Enhance Room Dimensions: Strategic use of lighter and darker hues can make a room feel larger or more intimate.
- Personalize Your Space: With two colors, you can experiment with complementary or contrasting tones that reflect your personal style.
Materials and Tools You’ll Need
Before you begin, gather these essential supplies:
- Paint: Two high-quality interior paints in your chosen colors.
- Primer: If needed, especially for covering existing dark colors or to ensure even application.
- Painter’s Tape: For crisp, clean lines between colors.
- Measuring Tape & Pencil: To mark the desired division line.
- Level or Laser Level: To ensure your line is perfectly horizontal or vertical.
- Drop Cloths & Plastic Sheeting: To protect your floors and furniture.
- Paint Brushes & Rollers: Brushes for cutting in and rollers for larger areas.
- Sponges and Rags: For cleaning and touch-ups.
- Sandpaper or a Sanding Sponge: For smoothing any imperfections on the walls.
- Step Ladder: To reach high areas safely.
Step-by-Step Process
1. Plan and Prepare Your Space
Design Concept:
Decide how you want to split the room. Two popular options include:
- Horizontal Split: Painting the lower (or upper) half one color and the opposite half another. This method can make low ceilings seem higher or vice versa.
- Vertical Split: Dividing a feature wall into two sections or accentuating a particular side of the room.
Preparation:
- Clear the Room: Remove or cover furniture, fixtures, and any wall hangings.
- Clean the Surfaces: Dust and clean the walls thoroughly. Repair any holes or cracks, then sand smooth.
- Apply Primer: If necessary, prime the walls to ensure proper adhesion and a uniform finish.
2. Choose Your Colors and Mark the Division
Selecting Colors:
Pick two colors that complement or contrast well. Consider how natural and artificial light will affect their appearance. Testing paint samples on a small section of the wall is highly recommended.
Marking the Line:
- Use a measuring tape and pencil to mark your desired dividing line on one wall.
- Check that your marks are level using a traditional level or a laser level.
- Extend the line around the room, ensuring consistency for a uniform look.
3. Paint the First Section
Decide which color you want to start with (commonly, the lighter shade is applied first to avoid the need for excessive overpainting). Follow these steps:
- Cut In: With a quality brush, paint along the edges and corners of the section you’re about to cover.
- Roll on the Paint: Use a roller for the larger areas. Apply at least two coats for even coverage, allowing adequate drying time between coats.
4. Tape Off the Division
After the first section is completely dry:
- Apply Painter’s Tape: Carefully adhere painter’s tape along the dividing line. Press the tape down firmly using a putty knife or a credit card to ensure it sticks well and prevents paint bleed.
- Seal the Edge: For an extra crisp line, lightly brush along the edge of the tape with the same color as the first section. This “seals” the edge, making it easier to achieve a clean border when you paint the second color.
5. Paint the Second Section
With the tape in place:
- Cut In Around the Tape: Use a small brush to carefully cut in the second color along the tape’s edge.
- Roll the Larger Area: Use your roller to cover the remaining section. Apply additional coats as needed.
- Keep the Work Neat: Work slowly and steadily to avoid any paint from seeping under the tape.
6. Remove the Tape and Touch Up
- Peel Off Tape While Wet: For the cleanest line, remove the tape while the second color is still slightly wet. This helps prevent the paint from peeling off with the tape.
- Inspect the Edges: Touch up any minor imperfections with a small artist’s brush, ensuring a seamless transition between colors.
Additional Tips for Success
- Practice First: If you’re new to the technique, practice on a piece of cardboard or a spare board to perfect your “cutting in” skills.
- Take Your Time: Rushing can lead to uneven lines. Patience is key to a professional finish.
- Consider Texture: If your walls have a slight texture, use a quality painter’s tape designed for textured surfaces to ensure a tight seal.
- Plan for Dry Time: Ensure you allocate enough time for each coat to dry properly—this might mean spreading the project over several days.
Conclusion – How to Paint a Room with Two Colors
Painting a room with two colors is a powerful yet accessible way to elevate your interior design. With careful planning, the right tools, and a methodical approach, you can create a striking, modern look that reflects your personality and enhances the space’s character. Whether you’re looking to visually expand a small room or simply add a creative twist to a neutral space, this guide will help you achieve a beautiful, custom finish that you’ll be proud to showcase.
Happy painting!

Haris Virk is the creative force and expert content strategist behind ScrapSafari.com. As an accomplished writer and designer, Haris leads the development of innovative content and visually stunning images that captivate audiences. His extensive experience in crafting engaging articles and unique design ideas makes him a pivotal contributor to ScrapSafari’s success.
Haris’s keen eye for aesthetics and trend forecasting ensures that every piece he produces not only informs but also inspires readers. His proficiency extends to mastering Pinterest strategies, where his thoughtfully crafted pins drive significant traffic and amplify the site’s reach.
With a passion for creativity and a deep understanding of content dynamics, Haris Virk brings a distinctive blend of originality and strategic thinking to the ScrapSafari team, solidifying its place as a go-to source for design, ideas, and inspiration.