Saunas have been a beloved tradition for centuries, offering a rejuvenating escape from the stresses of daily life. In recent years, the popularity of home saunas has skyrocketed as people seek to recreate this blissful experience in the comfort of their own backyards.
Among the various sauna options, wood fired saunas stand out as a luxurious and authentic choice, providing a unique ambiance and a connection to nature that electric saunas simply cannot match.
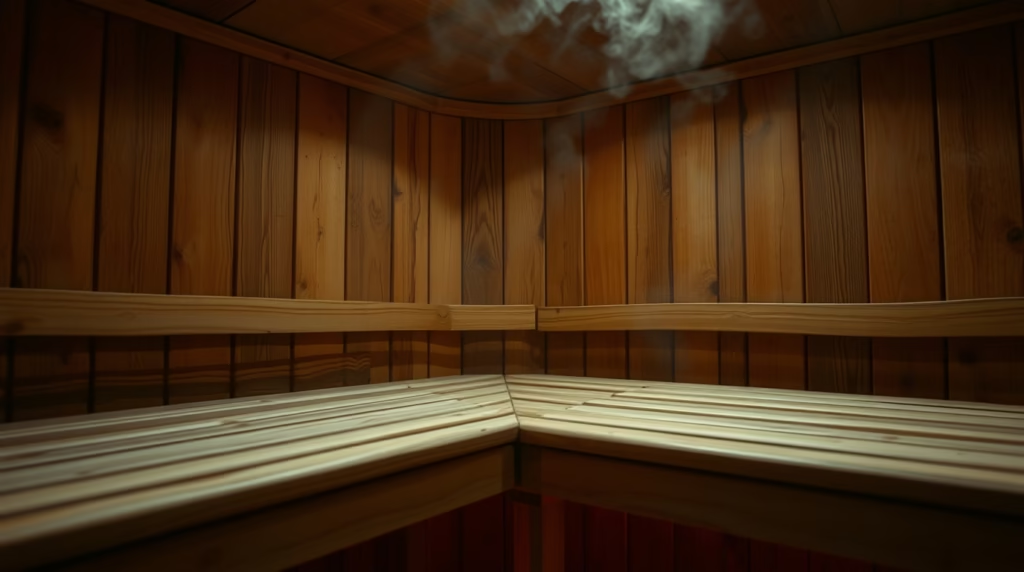
One of the primary advantages of a wood fired sauna is the unparalleled heat experience it offers. The gentle, enveloping warmth generated by a wood-burning stove creates a soft, comfortable heat that penetrates deep into the body, promoting relaxation and detoxification. Unlike electric saunas, which can feel dry and harsh, the moist heat of a wood fired sauna is more akin to a traditional Finnish sauna, allowing for easier breathing and a more enjoyable overall experience.
Moreover, the crackling sound of burning wood and the subtle aroma of smoke add a multi-sensory dimension to the sauna experience, transporting you to a rustic, natural setting. This connection to nature is further enhanced by the use of natural materials, such as cedar or pine, in the construction of the sauna itself, creating a warm and inviting atmosphere that electric saunas struggle to replicate.
Choosing the Right Materials For Wood Fired Sauna

When building a wood fired sauna, choosing the right materials is crucial for ensuring durability, safety, and an enjoyable sauna experience. Here are some key considerations for selecting the best materials:
Best Wood Types for Interior and Exterior
For the interior walls and benches, you’ll want to use a wood that can withstand high heat and moisture without warping or cracking. Cedar and redwood are excellent choices due to their natural resistance to rot and insects. The exterior can be constructed with more affordable options like pine or fir, as long as they’re properly treated and protected from the elements.
Insulation Guidance
Proper insulation is essential for maintaining the heat and humidity levels inside your sauna. Rigid foam insulation boards are a popular choice, as they provide excellent thermal resistance and moisture protection. Alternatively, you can use traditional fiberglass batt insulation, but be sure to encase it in a vapor barrier to prevent moisture absorption.
Flooring and Waterproofing Options
For the sauna floor, consider using a waterproof material like ceramic tiles or poured concrete. These surfaces are easy to clean and won’t be damaged by the high humidity. You’ll also need to waterproof the walls and ceiling using a vapor barrier or marine-grade sealant to prevent moisture from seeping into the insulation.
Ventilation Requirements
Adequate ventilation is crucial for maintaining a comfortable and safe sauna environment. You’ll need to install a vent near the ceiling to allow the hot, humid air to escape, as well as a fresh air intake vent near the floor. The size and placement of these vents will depend on the dimensions of your sauna.
DIY vs. Sauna Kits
While building a sauna from scratch can be a rewarding DIY project, it also requires significant time, effort, and expertise. Alternatively, you can purchase a pre-fabricated sauna kit, which includes all the necessary components and instructions for assembly. Sauna kits can be more expensive upfront but may save you time and ensure proper construction.
Selecting a Wood Burning Stove
Choosing the right wood-burning stove is crucial for an efficient and safe wood fired sauna experience. The stove’s size should match the sauna’s dimensions to ensure proper heating without overworking the unit. A general rule of thumb is 1 cubic meter of sauna volume requires approximately 1 kilowatt of heat output from the stove.
Safety features like a heat shield, insulated exterior, and proper clearances from combustible materials are essential. Look for stoves with a built-in water reservoir to produce steam and enhance the sauna experience. Stoves with a glass door allow you to enjoy the mesmerizing flames.
The type and amount of rocks used in the stove impact heat retention and steam production. Opt for dense, crack-resistant igneous rocks like diabase or peridotite. Avoid rocks like limestone that can crack and crumble over time. Typically, you’ll need 50-80 pounds of rocks for a residential sauna stove.
Proper installation following the manufacturer’s guidelines is key for safety and performance. Ensure the stove has proper clearances from walls, benches, and the sauna door. The chimney should extend above the roof ridge for adequate draft. Consider hiring a professional installer if you lack experience working with wood stoves and chimneys.
Building the Sauna Structure

Proper framing is crucial for the structural integrity and insulation of your wood-fired sauna. Start by laying a solid foundation, either a concrete slab or a wood platform raised off the ground. Then, construct the frame using rot-resistant wood like cedar or pressure-treated lumber. Ensure the framing is square and level, with adequate support for the walls, ceiling, and door.
Insulation is key to maintaining the high temperatures inside the sauna. Use a high-quality insulation material designed for high heat, such as rock wool or rigid foam boards. Insulate the walls, ceiling, and floor thoroughly, leaving no gaps or air pockets. Vapor barriers are also essential to prevent moisture buildup within the insulation.
Waterproofing is essential to protect the sauna from moisture damage. Apply a waterproof membrane or liquid sealant to the interior walls and floor before installing the final wall and floor coverings. This will prevent water from seeping into the framing and insulation.
Interior wall preparation involves installing cedar or other sauna-grade wood paneling. These materials are naturally resistant to moisture and can withstand high temperatures. Tongue-and-groove paneling is a popular choice for its seamless appearance and easy installation.
Benches are a crucial element of any sauna. Construct them using thick, durable wood like cedar or hemlock. The benches should be slightly sloped towards the back for comfort and drainage. Consider adding a lower bench for those who prefer cooler temperatures.
The door is another important component. Choose an exterior-grade door designed for saunas, or construct one using moisture-resistant wood and insulation. The door should seal tightly to prevent heat loss and feature a window or vent for ventilation.
Throughout the construction process, prioritize safety and follow all building codes and regulations. Proper ventilation, electrical wiring (if applicable), and fire safety measures are essential for a safe and enjoyable sauna experience.
Finishing Touches
Once the main structure of your wood-fired sauna is built, it’s time to add those final touches that will elevate the experience. Proper lighting, a reliable thermometer, a traditional sand timer, and essential accessories all contribute to creating an authentic and enjoyable sauna environment.
Lighting Options
Lighting is an important consideration for any sauna. While you don’t want harsh, bright lights that disrupt the relaxing atmosphere, you’ll need enough illumination for safety and visibility. Many sauna enthusiasts prefer soft, ambient lighting achieved through the use of salt lamps, candles, or low-wattage bulbs. If using electrical lighting, ensure it is properly rated for the high temperatures and humidity of a sauna environment.
Thermometer
To monitor the temperature and ensure a comfortable, consistent sauna experience, a quality thermometer is essential. Look for a sauna-specific thermometer that can withstand high heat and humidity. Mount it at eye level on the interior wall, away from direct heat sources for accurate readings.
Sand Timer
A traditional sand timer, or sauna clock, is not just a nostalgic touch – it serves a practical purpose. These timers typically measure intervals of 15 minutes, allowing you to keep track of your sauna session duration without the distraction of a digital clock. Placing the sand timer within easy view from the sauna benches is recommended.
Essential Accessories
To fully enjoy your wood-fired sauna experience, consider adding a few key accessories. A sturdy wooden bucket and ladle are necessary for pouring water over the heated rocks to create that revitalizing burst of steam. Sauna towels and robes not only provide modesty but also help wick away perspiration. And don’t forget a supply of fresh, clean drinking water to stay hydrated during your sauna session.
Using Your Sauna Safely
Heating your wood-fired sauna is both an art and a science. Start by building a small fire in the stove using dry, seasoned hardwood. As the fire grows, gradually add more wood, being careful not to overheat the rocks. The ideal sauna temperature is between 160°F and 195°F. Use a thermometer and keep the door slightly ajar until you reach your desired heat level.
When it comes to duration, listen to your body. For most people, 15-20 minutes is a reasonable starting point. Begin with shorter sessions and work your way up. Stay hydrated by drinking plenty of water before and after. Have a cool shower ready to slowly lower your body temperature post-sauna.
While saunas offer many health benefits like improved circulation and detoxification, there are precautions to take. Avoid the sauna if you are pregnant, have low blood pressure, or certain medical conditions. Never use the sauna while under the influence of drugs or alcohol. Children and the elderly should be cautious and limit their exposure.
Stay safe by providing ample ventilation, keeping a bucket of water nearby to cool the rocks if needed, and having a friend or partner on standby in case you need assistance. Listen to your body, ease into longer sessions gradually, and make hydration a priority for the full sauna experience.
Maintaining Your Wood-Fired Sauna
Proper maintenance is key to ensuring your wood-fired sauna stays in top condition and provides years of relaxing enjoyment. Here are some essential maintenance tasks to keep in mind:
Cleaning the Stove and Rocks
Over time, the rocks in your sauna stove will accumulate a buildup of minerals and debris from the water thrown on them. This can affect heating efficiency and create unpleasant odors. Plan to remove and clean the rocks every few months. Simply take them out, scrub off any crusty buildup with a stiff brush and some water, and let them fully dry before replacing. Additionally, vacuum out any ash or debris from the stove’s firebox regularly.
Replacing Wood
The interior cedar or other softwood will gradually dry out and may need to be replaced every 5-10 years, depending on usage. Keep an eye out for cracking, warping, or other signs of wear. Replacing just a few boards at a time can help extend the life of your sauna’s interior wood. For the exterior, you’ll want to re-stain or reseal as needed to protect the wood from weather damage.
Checking Insulation
Proper insulation is crucial for heat retention and efficiency. Periodically inspect the sauna’s insulation, especially in areas around pipes, vents, doors and windows where settling can occur. Add more insulation as needed to any thin spots. Also check for moisture issues that could compromise the insulation.
Troubleshooting
If your sauna isn’t heating up properly, there could be a few potential causes – from air leaks, to issues with the stove, to problems with the door or window seals. Systematically check each component and don’t be afraid to call in a professional if you can’t pinpoint the problem. Keeping your sauna well-maintained will ensure it lasts for years and continues providing a stellar sauna experience.
FAQs – Wood Fired Sauna
How much does it cost to build your own wood fired sauna?
The cost of building a DIY wood-fired sauna can vary greatly depending on the size, materials used, and whether you opt for a pre-fabricated sauna kit or build it entirely from scratch. On average, expect to spend between $3,000 to $10,000 for a modest 4×6 ft sauna built with basic materials like cedar wood and a wood-burning stove. Larger saunas or those built with premium materials can cost upwards of $15,000 or more.
Do you need permits to build a backyard sauna?
In most cases, yes, you will need to obtain the proper permits from your local municipality before constructing a backyard sauna. Permit requirements can vary based on your location, but generally cover aspects like zoning, electrical work, and ensuring the structure meets building codes. It’s essential to check with your local authorities to avoid any legal issues or fines.
How long does it take to build a DIY wood sauna?
The construction time for a DIY wood-fired sauna can range from a few weekends to several weeks, depending on your experience level, the complexity of the design, and whether you’re working alone or with help. A simple 4×6 ft sauna built from a kit may take an experienced DIYer around 20-30 hours, while a custom-built sauna from scratch could take 80 hours or more.
What size wood stove do I need?
The size of the wood-burning stove you’ll need for your sauna depends on the interior volume of the sauna room. As a general guideline, you’ll want a stove with a heating capacity of around 1,000 BTUs per cubic foot of sauna space. For example, a 4×6 ft sauna (approximately 144 cubic feet) would require a stove with a heating capacity of around 144,000 BTUs.
How often do you need to replace sauna wood?
The frequency of replacing the wood in your sauna will depend on the type of wood used, the amount of use, and how well it’s maintained. Generally, cedar and other softwoods used for sauna interiors can last 10-15 years with proper care. Hardwoods like oak or ash may last 20 years or more. Routinely cleaning and maintaining the sauna, as well as ensuring proper ventilation, can help extend the life of the wood.
What is the ideal temperature for a sauna?
The ideal temperature for a traditional Finnish sauna typically ranges from 160°F to 200°F (71°C to 93°C). Most sauna enthusiasts prefer temperatures between 180°F and 195°F (82°C to 91°C) for an optimal sauna experience. However, personal preference and health considerations may dictate a slightly lower or higher temperature range.
How long should you stay in a sauna?
The recommended duration for a sauna session is typically between 10 to 20 minutes, with breaks in between to cool down and rehydrate. Beginners should start with shorter sessions of 5-10 minutes and gradually work their way up. It’s important to listen to your body and exit the sauna if you experience dizziness, nausea, or discomfort. Staying in the sauna for extended periods can lead to dehydration and other health risks.
Conclusion
Building your own wood-fired sauna is a rewarding project that allows you to create a personal oasis of relaxation and wellness right in your backyard. By following the key steps outlined in this guide, you can construct a durable, efficient, and enjoyable sauna that will provide years of therapeutic benefits.
The most crucial steps include carefully selecting the right materials, properly insulating the structure, choosing and installing the appropriate wood-burning stove, and ensuring adequate ventilation. Attention to detail in these areas will ensure a safe and comfortable sauna experience.
Once your sauna is complete, you can look forward to the numerous benefits of regular sauna use. Immersing yourself in the soothing heat and humidity can alleviate stress, promote better sleep, improve cardiovascular health, and even boost your immune system. The wood-fired aspect adds a natural, authentic ambiance that enhances the overall experience.
As you settle into your new sauna routine, take the time to appreciate the tranquility and escape from the hustle and bustle of daily life. Embrace the opportunity to unwind, rejuvenate, and connect with yourself or loved ones in this personal sanctuary. Enjoy the crackling of the fire, the gentle hiss of the steam, and the profound sense of relaxation that only a wood-fired sauna can provide.

Haris Virk is the creative force and expert content strategist behind ScrapSafari.com. As an accomplished writer and designer, Haris leads the development of innovative content and visually stunning images that captivate audiences. His extensive experience in crafting engaging articles and unique design ideas makes him a pivotal contributor to ScrapSafari’s success.
Haris’s keen eye for aesthetics and trend forecasting ensures that every piece he produces not only informs but also inspires readers. His proficiency extends to mastering Pinterest strategies, where his thoughtfully crafted pins drive significant traffic and amplify the site’s reach.
With a passion for creativity and a deep understanding of content dynamics, Haris Virk brings a distinctive blend of originality and strategic thinking to the ScrapSafari team, solidifying its place as a go-to source for design, ideas, and inspiration.