

Why Build Your Own Wooden Handrails?
Building your own wooden handrails for exterior stairs offers several benefits over purchasing pre-made railings. Firstly, constructing handrails yourself can lead to significant cost savings compared to hiring a professional or buying expensive pre-fabricated systems. By sourcing the materials and providing the labor yourself, you can create high-quality handrails at a fraction of the cost.
Secondly, building your own handrails allows for complete customization to suit your specific needs and aesthetic preferences. You have the freedom to choose the type of wood, the design style, the baluster spacing, and any decorative accents or curves. This level of personalization ensures that your handrails complement the architectural style of your home and outdoor living spaces.
Finally, there is a sense of pride and accomplishment that comes with constructing something with your own hands. Tackling a DIY project like building handrails can be a rewarding experience, allowing you to develop new skills and take ownership of the final product. The satisfaction of admiring your handiwork and knowing that you created a functional and visually appealing element for your home is truly fulfilling.
Planning Your Handrail Project
Before you start building, it’s important to carefully plan out your handrail project. Proper planning will ensure your new railings are not only beautiful but also safe and code-compliant.
Measuring Your Stairs
The first step is to take accurate measurements of your stairs. You’ll need to measure the total length of the stair run to determine how much railing you need. Don’t forget to account for any turns or angles. It’s also crucial to measure the rise and run of each step to ensure your railings meet code requirements for height and pitch.
Choosing the Right Wood
When selecting wood for outdoor handrails, you’ll want to choose a species that can withstand the elements. Cedar, redwood, and pressure-treated pine are all excellent choices for their natural weather resistance. Consider the aesthetic you want as well – cedar has a warm, reddish tone while redwood is more brown. Pressure-treated pine is also a cost-effective option.
Baluster Style and Spacing
Balusters, or spindles, are the vertical posts that run between the top and bottom rails. You’ll need to decide on a baluster style that suits your home’s architecture. Common options include square, turned, or decorative balusters. Most building codes require balusters to be spaced no more than 4 inches apart to prevent accidents.
Design Considerations
In addition to functionality, you’ll want to consider the aesthetics of your new handrails. Will you incorporate curves or angles? Add decorative newel posts at the top and bottom? Customize with decorative wood carvings or metal accents? Taking the overall design into account will result in handrails that elevate your home’s curb appeal.
Gathering Materials and Tools
Building your own wooden handrails requires gathering the right materials and tools. For the lumber, you’ll need weather-resistant wood like cedar, redwood, or pressure-treated pine for the top and bottom rails, posts, and balusters (spindles). The amount needed will depend on the length and design of your stairs.
In terms of fasteners and hardware, you’ll need exterior-grade wood screws, lag bolts for securing posts, brackets for attaching the railing sections, and concrete anchors if installing posts into concrete. Stainless steel or hot-dipped galvanized fasteners resist corrosion.
For power tools, a miter saw is essential for making accurate angled cuts on the railing pieces. A drill is needed for driving screws and drilling baluster holes. A random orbit sander allows you to smooth surfaces for a professional finish. Other useful tools include a circular saw, jigsaw, clamps, and a level.
Other necessary supplies include:
- Exterior wood glue for a stronger railing assembly
- Wood filler to patch holes and imperfections
- Primer and exterior paint or wood stain for finishing
- Paintbrushes, rags, mineral spirits for staining/painting
- Wood sealer to protect against moisture and UV damage
- Safety gear like eye protection and work gloves
Having all the right lumber, fasteners, tools, and supplies on hand ensures your handrail project goes smoothly from start to finish. Proper planning prevents delays and allows you to build sturdy, long-lasting handrails.
Building the Railing Sections
One of the most important steps in constructing your wooden handrails is building the individual railing sections. This involves cutting the wood pieces to the proper lengths, drilling holes for the balusters, assembling the sections, and sanding for a smooth finish.
Start by measuring and cutting the top and bottom rails to the desired lengths using a miter saw or circular saw. Make sure the ends are cut square for a proper fit. Next, mark the locations for the balusters on the top and bottom rails, spacing them no more than 4 inches apart to meet code requirements.
Use a drill press or handheld drill with a large diameter drill bit to create the holes for the balusters. The holes should be slightly larger than the baluster dimensions to allow for easy insertion. If using square balusters, drill square holes using a speciality square drill bit.
Cut the individual balusters to length, making any angle cuts needed for stairs with winders or curved sections. Apply a thin bead of wood glue into the baluster holes on one rail, then insert the balusters. Place the second rail on top, ensuring the balusters fit snugly into the holes. Use clamps to hold the section tightly together while the glue dries.
Once the glue has cured, reinforce the railing section by driving galvanized finish nails or exterior screws through the rails into the ends of each baluster. This will prevent the balusters from loosening over time.
Finally, sand all surfaces of the railing section using an orbital sander and progressively finer grits until smooth. Be sure to sand along the grain direction. The sanded sections are now ready for installation and finishing.
Installing the Handrails
One of the most critical steps in building exterior wooden handrails is installing them properly and securely. This involves mounting the posts firmly into the stairs or deck, attaching the railing sections to the posts, and ensuring everything is level and aligned correctly.
Mounting Posts
The posts are the vertical supports that the handrails attach to. They need to be extremely sturdy and able to withstand the weight and forces placed on the railing. For wood posts, you’ll want to lag bolt them directly into the structural framing of the stairs or deck using galvanized lag screws. Drill pilot holes first to prevent splitting the wood.
If mounting posts on concrete surfaces like steps, you’ll need to use concrete anchors designed for exterior use. Start by marking the exact locations, then drill holes into the concrete with a masonry bit. Clean out any dust and insert the anchors, securing the posts with galvanized bolts or lag screws.
Attaching Railing Sections
With the posts securely mounted, you can now attach the pre-assembled railing sections. Use sturdy brackets or flanges to connect the top and bottom rails to the posts. The railings should be perfectly level from section to section.
Check that the railing height meets local code requirements, which is typically between 34-38 inches measured from the nose of the step. Also ensure the balusters or spindles have no more than 4 inches of spacing between them as required by most codes.
Checking Alignment and Making Adjustments
Before securing everything permanently, do a final check that the entire railing system is level, plumb (vertically straight), and aligned correctly. Use a level in multiple planes along the rails. The posts should also be perfectly vertical.
If anything is out of alignment, make adjustments by loosening the lag bolts or brackets and gently tapping or pushing the components into the proper position. Having an extra set of hands is helpful for this step. Once satisfied, firmly tighten all hardware and fasteners.
Proper installation is crucial for ensuring the safety and longevity of your new wooden handrails. Taking the time to mount posts securely and check alignment will result in sturdy, code-compliant railings.
Finishing and Customizing
After assembling and installing your wooden handrails, there are several finishing steps to achieve a polished look and protect the wood from the elements. Proper finishing techniques will also help customize the aesthetic to suit your home’s exterior style.
First, use wood filler to conceal any holes or imperfections from screws, nails, or construction adhesive. Allow the filler to fully dry and then sand the area smooth. Vacuum up any remaining wood dust.
Next, prime all surfaces of the handrail with an exterior-grade wood primer. This will help the topcoat of paint or stain adhere properly. Use a high-quality brush or spray applicator for even coverage, making sure to work the primer into all crevices.
Once the primer has dried completely per the manufacturer’s instructions, you can apply your desired topcoat. For a solid color finish, use an exterior latex or oil-based paint formulated for wood surfaces. For a natural wood look, opt for an exterior semi-transparent or solid stain.
When painting or staining, use long, even brush strokes following the direction of the wood grain. Apply as many coats as needed for full coverage, allowing each coat to dry between applications. Consider adding a decorative glaze or dry-brushing for an aged look.
To protect the finish and extend the life of your handrails, apply a clear exterior wood sealer over the paint or stain once fully cured. This will shield against moisture, UV rays, and other environmental factors.
Finally, customize your handrails with decorative accents like finials, post caps, or wooden inlays between balusters. Pre-made wooden accent pieces are available, or you can craft your own for a truly unique touch. Use an exterior-grade construction adhesive to securely attach accents.
With some attention to detail in the finishing process, your DIY wooden handrails will be both beautiful and built to withstand the outdoor elements for years to come.
Code Requirements for Handrails
Handrails must meet certain building code requirements to ensure safety and structural integrity. While codes can vary by location, there are some common standards to be aware of:
Handrail Height: Handrails should be installed between 34-38 inches above the leading edge of the stair treads. This height allows for a comfortable grasp while ascending or descending the stairs.
Baluster Spacing: To prevent falls, balusters (vertical spindles) must be spaced close enough that a 4-inch sphere cannot pass through anywhere along the railing. A common maximum spacing is 4 inches on center.
Graspability: The handrail itself should have a graspable cross-section with a perimeter of at least 4 inches and not more than 6.25 inches. This allows for a firm, comfortable grip along the entire length.
Structural Integrity: Handrails must be able to withstand a concentrated load of 200 pounds applied in any direction to prevent collapse or failure. Proper fastening to secure posts and footings is critical for this strength requirement.
While aesthetic appeal is important, prioritizing these code-compliant specifications will ensure your DIY handrail project results in a safe, functional, and long-lasting railing system for your exterior stairs.
Design Ideas and Inspiration
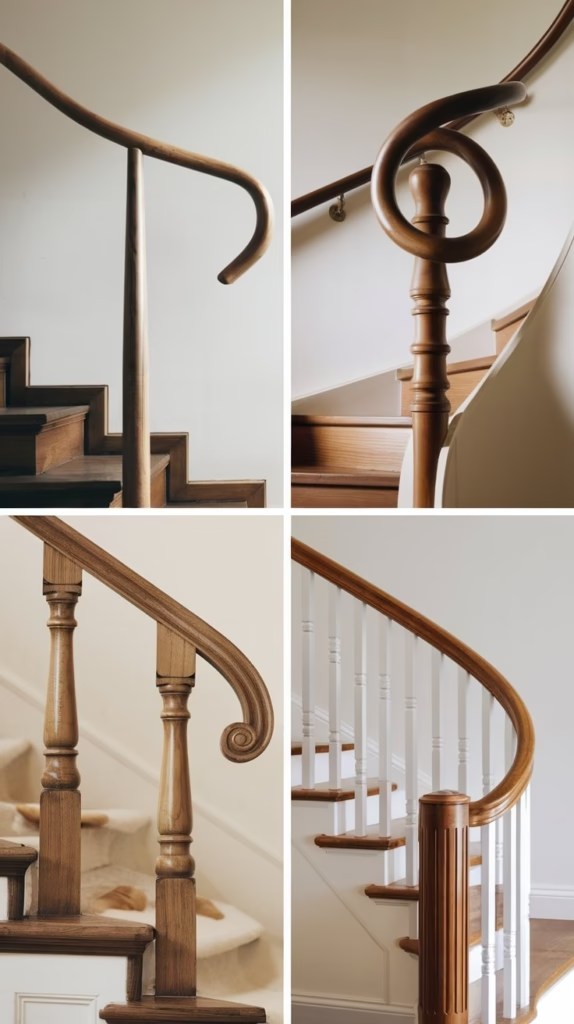
When building your own wooden handrails, you have the opportunity to get creative and design something truly unique for your home. One popular option is to incorporate curved sections into your railing for a sleek, flowing look on staircases with winding or angled steps. Curved rails require more precise measuring and cutting, but can add an elegant touch.
Another on-trend design is to use cable or wire railing rather than traditional wood balusters. This open style provides unobstructed views while still meeting code requirements for safety. The contrast of metal cables against a richly stained wooden handrail creates a stunning modern aesthetic.
Speaking of stains and finishes, don’t be afraid to go bold with color! Warm tones like honey oak or deep mahogany can imbue your stairs with a classic, luxurious vibe. For a more rustic feel, consider leaving the wood unstained to showcase its beautiful natural knots and grains. And bright white painted rails pair perfectly with contemporary or farmhouse decor styles.
You can also bring visual interest through decorative wood carvings or metal accents on your posts and railings. Simple details like curved volutes or basket caps instantly elevate basic rails. Or make a statement with intricate diamond or scroll cutouts along the railings themselves. The design possibilities are endless when you build custom!
Handrail Maintenance and Care
Proper maintenance is key to ensuring your beautiful new wooden handrails look great and remain safe for years to come. Here are some tips for keeping them in top condition:
Cleaning
Regularly wipe down your handrails with a mild soap and water solution to remove dirt, grime, and residue that can build up over time. Avoid using harsh chemicals or abrasive cleaners that could damage the wood finish. For tougher stains or mildew, make a paste with oxygen bleach and water, let it sit for 15 minutes, then gently scrub and rinse.
Resealing Wood
Depending on the level of sun exposure and wear, you’ll likely need to reseal exterior wood handrails every 1-3 years. This protective topcoat prevents moisture damage and UV deterioration. Lightly sand the surfaces, clean thoroughly, then apply a fresh coat of penetrating wood sealer or exterior stain/sealant in your desired color. Multiple coats may be needed for full protection.
Tightening Hardware
Every 6-12 months, do a quick check of all screws, bolts, and brackets securing your handrail system. Tighten any loose hardware with the appropriate tools to prevent potential safety issues from developing. Pay close attention to railing posts anchored into concrete, making sure they remain firmly mounted with no movement over time.
With some simple routine maintenance, your DIY wooden handrails can remain a beautiful, long-lasting, and safe addition to your home’s exterior for many years. A little preventative care goes a long way!
Hiring a Pro vs. DIY
Building exterior handrails yourself can save a significant amount of money compared to hiring a professional contractor. The cost of materials for a typical set of wooden handrails is just a few hundred dollars, whereas a contractor may charge $1,000 or more for labor and installation.
However, this is a fairly involved DIY project that requires some woodworking skills and experience with power tools. If you’re not confident in your abilities to measure precisely, cut wood accurately, and properly install the railings to meet code, it may be worth paying a professional. Improper installation could lead to safety hazards.
The time investment for a DIY handrail project is also considerable. Expect to spend at least 1-2 full days measuring, cutting, assembling, and installing the railings, plus additional time for prep work like sanding and finishing. A professional crew can typically complete the job in less than a day.
If you have intermediate DIY skills, the right tools, and the patience for a multi-day project, building handrails yourself can save you a bundle. But for peace of mind or if you lack experience, hiring an insured and licensed contractor may be the better option, despite the higher costs.

Haris Virk is the creative force and expert content strategist behind ScrapSafari.com. As an accomplished writer and designer, Haris leads the development of innovative content and visually stunning images that captivate audiences. His extensive experience in crafting engaging articles and unique design ideas makes him a pivotal contributor to ScrapSafari’s success.
Haris’s keen eye for aesthetics and trend forecasting ensures that every piece he produces not only informs but also inspires readers. His proficiency extends to mastering Pinterest strategies, where his thoughtfully crafted pins drive significant traffic and amplify the site’s reach.
With a passion for creativity and a deep understanding of content dynamics, Haris Virk brings a distinctive blend of originality and strategic thinking to the ScrapSafari team, solidifying its place as a go-to source for design, ideas, and inspiration.